
This tutorial guides you through the steps of connecting an MCC 118 board with a Raspberry Pi 4 and the Record Evolution platform to read and extract measurement data. In just a few steps, you set up a foundation for IoT data acquisition.
Here are the steps:
- Connect the MCC DAQ HAT 118 to a Raspberry Pi
- Connect the device to the Record Evolution Platform
- Build the app Data Logger MCC 118 onto the device
- Start collecting data
For more information on MCC DAQ HAT 118, see here.
To retrieve the Data Logger MCC 118 app from the Record Evolution app store, see here: https://studio.record-evolution.com/en/apps/Data_Logger_MCC_118.
Connecting MCC 118 to Raspberry Pi to measure analog voltage
It’s that simple: The MCC 118 header plugs into the 40-pin GPIO connector on Raspberry Pi.
Details about MCC 118
The MCC 118 is a voltage measurement DAQ HAT (Hardware Attached on Top) board made for use with Raspberry Pi. A HAT is an add-on board with a 40W GPIO (General Purpose Input/Output) connector conforming to the Raspberry Pi HAT specification. The MCC 118 HAT provides 8 single-ended (SE) analog inputs for voltage measurements.
Any analog sensor, e.g. temperature, sound, etc., can be used on the board. You can stack up to eight MCC HATs onto one Raspberry Pi. However, the onboard jumpers must be set in order to allocate the address to the MCC HATs.
For more information on MCC 118, see the product specifications.
Details about Raspberry Pi
Raspberry Pi is a tiny single-board computer. When used as an IoT device, Raspberry Pi offers a cost-efficient way to collect data. This is why we use Raspberry Pi as our default R&D device to acquire analog voltage data from the MCC 118 device with the help of an IoT app that is installed on the Raspberry Pi.
For more information on Raspberry Pi 4, see here.
So to continue, you simply need to put the MCC 118 board onto a Raspberry Pi as shown below:

You install the 2×20 receptacle with extended leads onto the Raspberry Pi GPIO header by pressing the + portion of the receptacle onto the header pins. Make sure you don’t bend the leads of the receptacle.
Connecting to the Record Evolution platform for IoT & AI
Next, you need to connect the Raspberry Pi to the Record Evolution platform and bring it online. This is how you create the foundation for accessing and controlling the MCC 118 device via the Record Evolution platform.
In what follows, we will go through the following steps:
- Format/flash an SD card
- Connect your Raspberry Pi to the Record Evolution platform
- Bring your Raspberry Pi online
- Install an IoT app on the Raspberry Pi
This is what you need:
- An MCC 118 device
- A Raspberry Pi single-board computer (preferably a Raspberry Pi 4)
- An SD card (8 GB or higher)
- A Windows or a Mac computer with internet access
- Power supply
You may also want to use a self-powered USB hub.
To trace the process, sign up or log into the platform.
Forming a device swarm and establishing a connection
From your homepage on the platform, go to Devices and click on ADD DEVICE SWARM to create your device management environment:

To build your own swarm, go to Devices and click ADD DEVICE SWARM.
A swarm is your basic, compact, fully autonomous IoT device management environment on the Record Evolution platform. A swarm consists of a set of IoT devices, all device and device group settings, as well as the privilege structure specific to the assets of that swarm.
To add a new device, enter your newly created swarm and select NEW DEVICE from the menu. The first step is to create a virtual device on the platform:

Once you have created your virtual device, you may add it to a device group. See here for details.
To equip your physical device with the necessary system and configuration for the platform, you need to prepare and set up an individual SD card for that device.
The flashing process
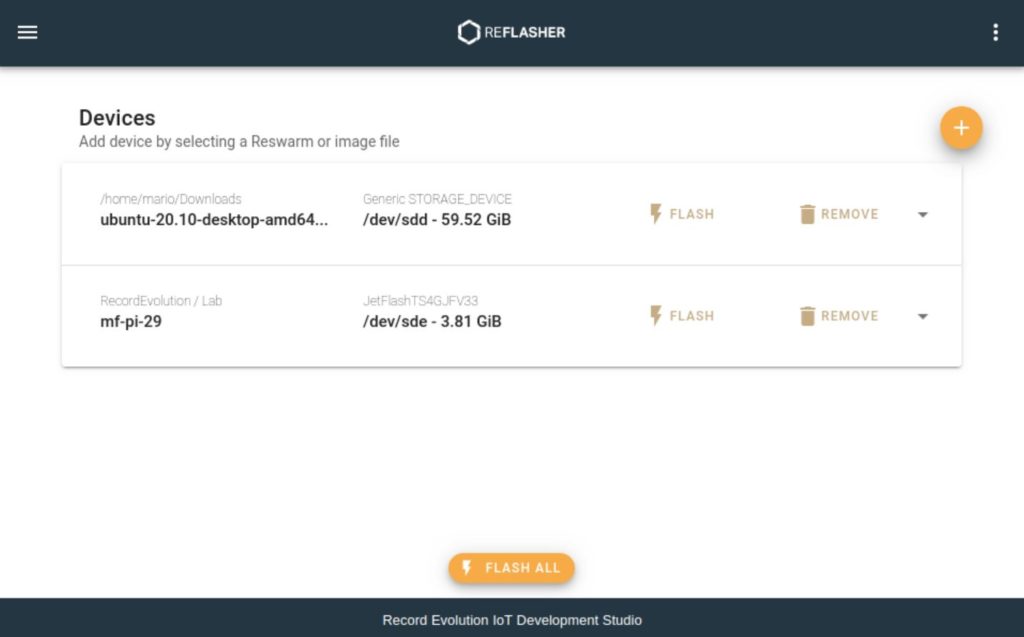
To do that, download the Record Evolution Reflasher. This desktop app enables you to create bootable configured flash drives and is available for Windows, Linux, and macOS. If adding a device for the first time, you will trigger an automatic download of the Reflasher.
Now install the app on your computer and simply follow the instructions to go through the flashing process. Click on FLASH / FLASH ALL to continue. The app allows you to flash and configure multiple devices at once:
Once done, remove the SD card from the card reader. Insert the SD card into the Raspberry Pi and power the device:

Once the device has booted successfully from the flashed SD card, it will try to connect to the platform. Connecting may take several minutes after the very first boot of your device. Go to your device swarm and see if the device icon has turned green. If yes, that means your device is online.
On the IoT platform, you can connect to any Docker-capable device running on Linux from any location using a simple secure internet connection. For details on how to connect an IoT device, see here.
To learn more about the Record Evolution Reflasher, see here.
Build the Data Logger MCC 118 app on the device
This app will take care of everything including the configuration of the MCC 118 device. Once built, the app can be run and the data can be collected either as a wave or binary files. This way, the collected data makes it to the cloud and lands directly in the IoT cloud platform where it is ready for further processing and advanced analytics.
Using this IoT application, you make voltage measurements of the MCC DAQ HAT channels and publish/log the data. The app continuously acquires blocks of analog input data for a user-specified group of channels and writes it into a user-specified file format.
Writing the data to a file
Depending on the parameter settings below, the data is written as a file into the configured folder. The data written to the file can be either of binary or wave format. Wave files are playable and written separately for each channel.
The binary file is written with an npz extension and contains important environmental variables as metadata. The metadata is saved under the params_mcc118 section whereas the sound data is saved under the data_mcc118 section. Below is an example of reading data from the binary file written by the app:

Installing the app
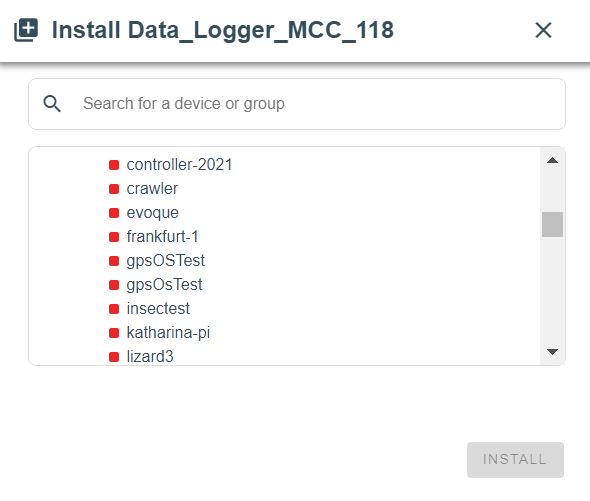
To use the app on the Raspberry Pi, simply retrieve the app (https://studio.record-evolution.com/en/apps/Data_Logger_MCC_118) from the Record Evolution app store and click on Install:

From the dropdown menu, select the connected devices on which you want to install the app:
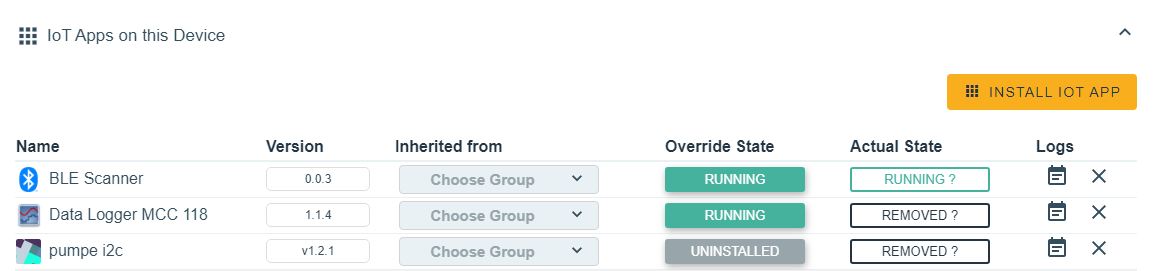
Once you hit Install, the device will start downloading the app. You will be redirected to your device swarm where you can observe the app status in the device settings:
To set up the device with your MCC DAQ HAT, you can also provide some parameters. To do so, go to your device swarm and pick the device group containing your Raspberry Pi.
In the group settings, click on the environmental variables and provide the environmental variables indicated in the app’s Readme file at https://studio.record-evolution.com/en/apps/Data_Logger_MCC_118. If no environmental variables are provided, default values are used.
A note for developers
To develop and build the app, we are creating a Docker image you can run on the device. Detailed information about the installation of MCC DAQ HAT can be found in this Git repository.
So that’s it! If curious, explore the Record Evolution platform here or get in touch to book a demo.
About Record Evolution
We are a data science and IoT team based in Frankfurt, Germany, that helps companies of all sizes innovate at scale. That’s why we’ve developed an easy-to-use industrial IoT platform that enables fast development cycles and allows everyone to benefit from the possibilities of IoT and AI.